Creating the Skull Kid: A Legend of Zelda Adventure


Welcome back to Katie's Korner! Today, I'm thrilled to share a behind-the-scenes look at my latest project: a Skull Kid costume from The Legend of Zelda: Majora's Mask. This costume is an exciting blend of artistry and technical challenge, and I can't wait to walk you through the process. At OuterRim Creatives, we live by our tagline: tailored costumes, limitless possibilities. This project truly embodies that spirit.
The Inspiration
Skull Kid is one of the most iconic characters from The Legend of Zelda series, known for his mischievous nature and distinctive outfit. The costume I'm creating features a weathered top, a unique hat, vibrant shorts, and intricate details that bring the character to life. Here's a glimpse of the nearly completed costume:
Fabric and Pattern Selection
The costume requires a variety of materials to achieve its unique look. For the top, I used a weathered-looking fabric that gives it a rustic feel. The vibrant red and green fabrics for the hat and shorts needed to have the right balance of stiffness and flexibility to hold their shape while allowing movement.
I chose a lighter canvas-type fabric for the shorts, with a grassy pattern that perfectly matches Skull Kid's whimsical appearance. The shorts are designed to stand out with the help of dense craft interfacing, giving them a structured look that mimics tree trunks covered in grass.
Creating the Top
The top was one of the first pieces I tackled. It features a central seam, lots of flounce, and big, drapey sleeves. Initially, I was concerned it might be too short, but after some adjustments, I managed to get the fit just right. Here's a look at the completed top:
To achieve a more weathered, earthy look, I plan to use shoe polish stain on the fabric. This technique will add depth and make the costume appear more authentic to the character's woodland origins.
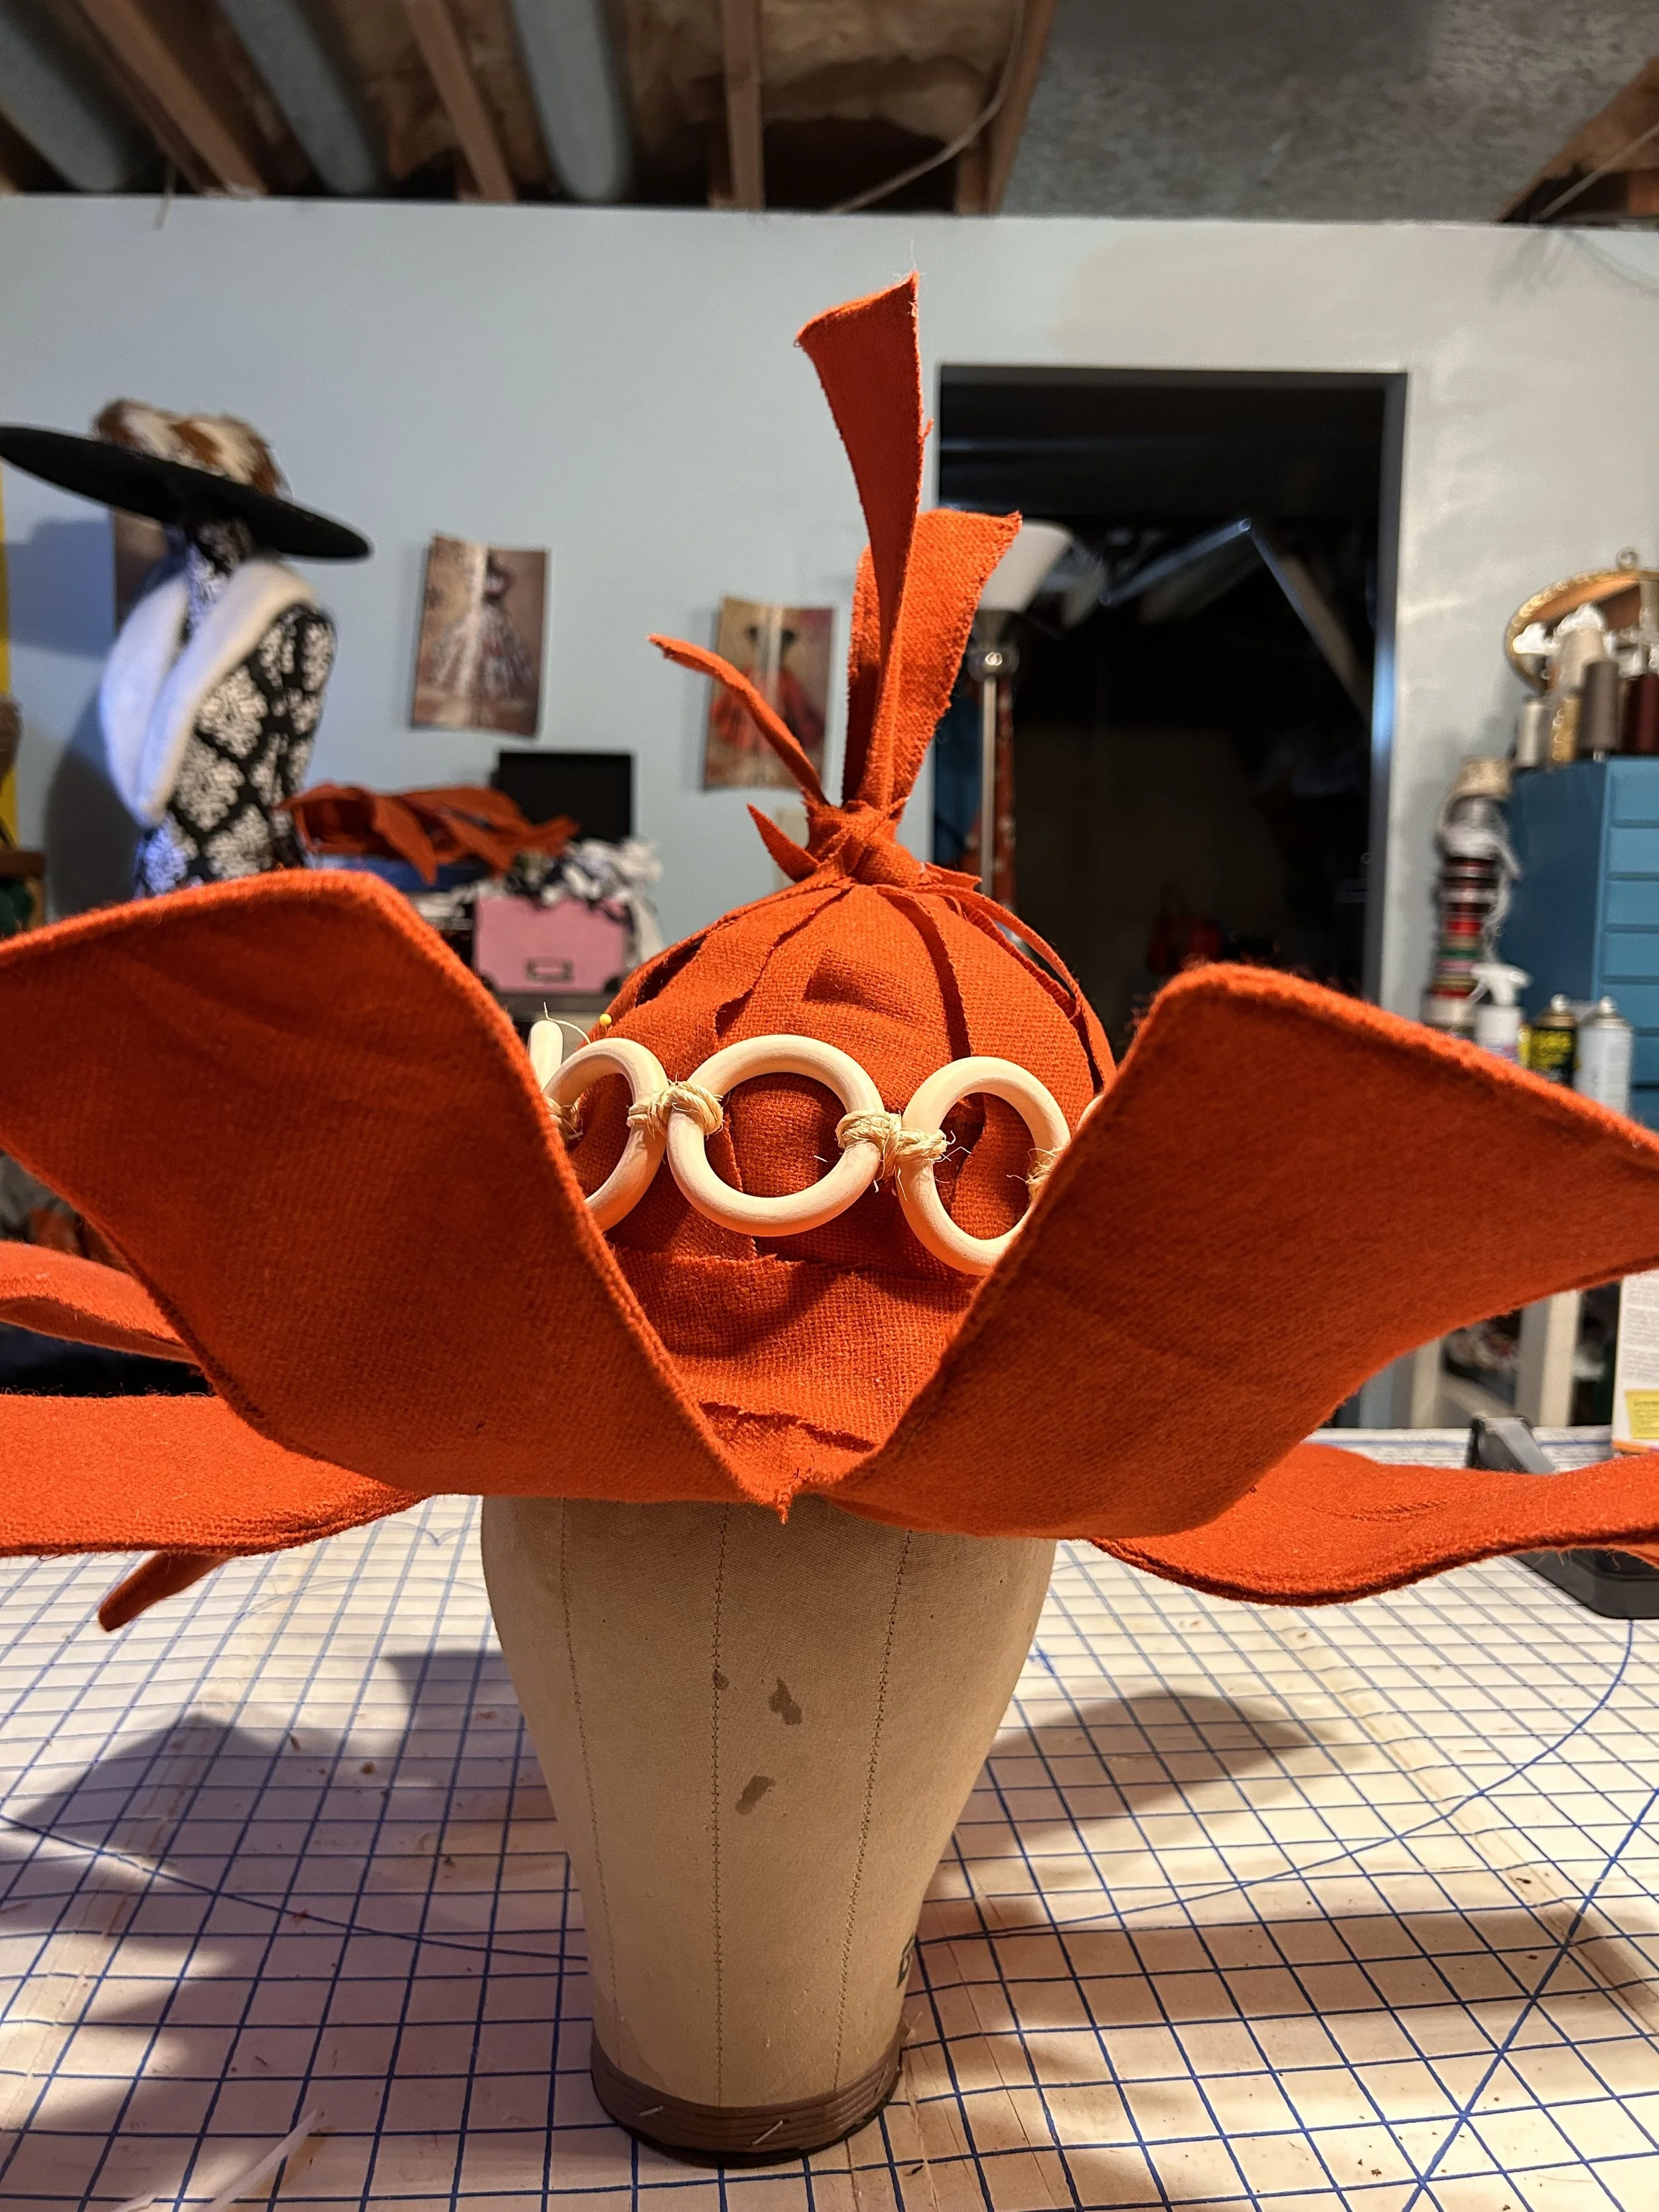
Crafting the Hat
The hat is one of the most challenging and exciting parts of this project. Hats aren't always my favorite, but I came up with an idea to make this one work. The hat features a wide brim and a distinctive peak, requiring a sturdy base and careful construction.
I started with a woven straw hat, removing the band and using glue and wrapping stay to shape it. This method ensures the hat stays together well and doesn't fall apart, even with its intricate design.
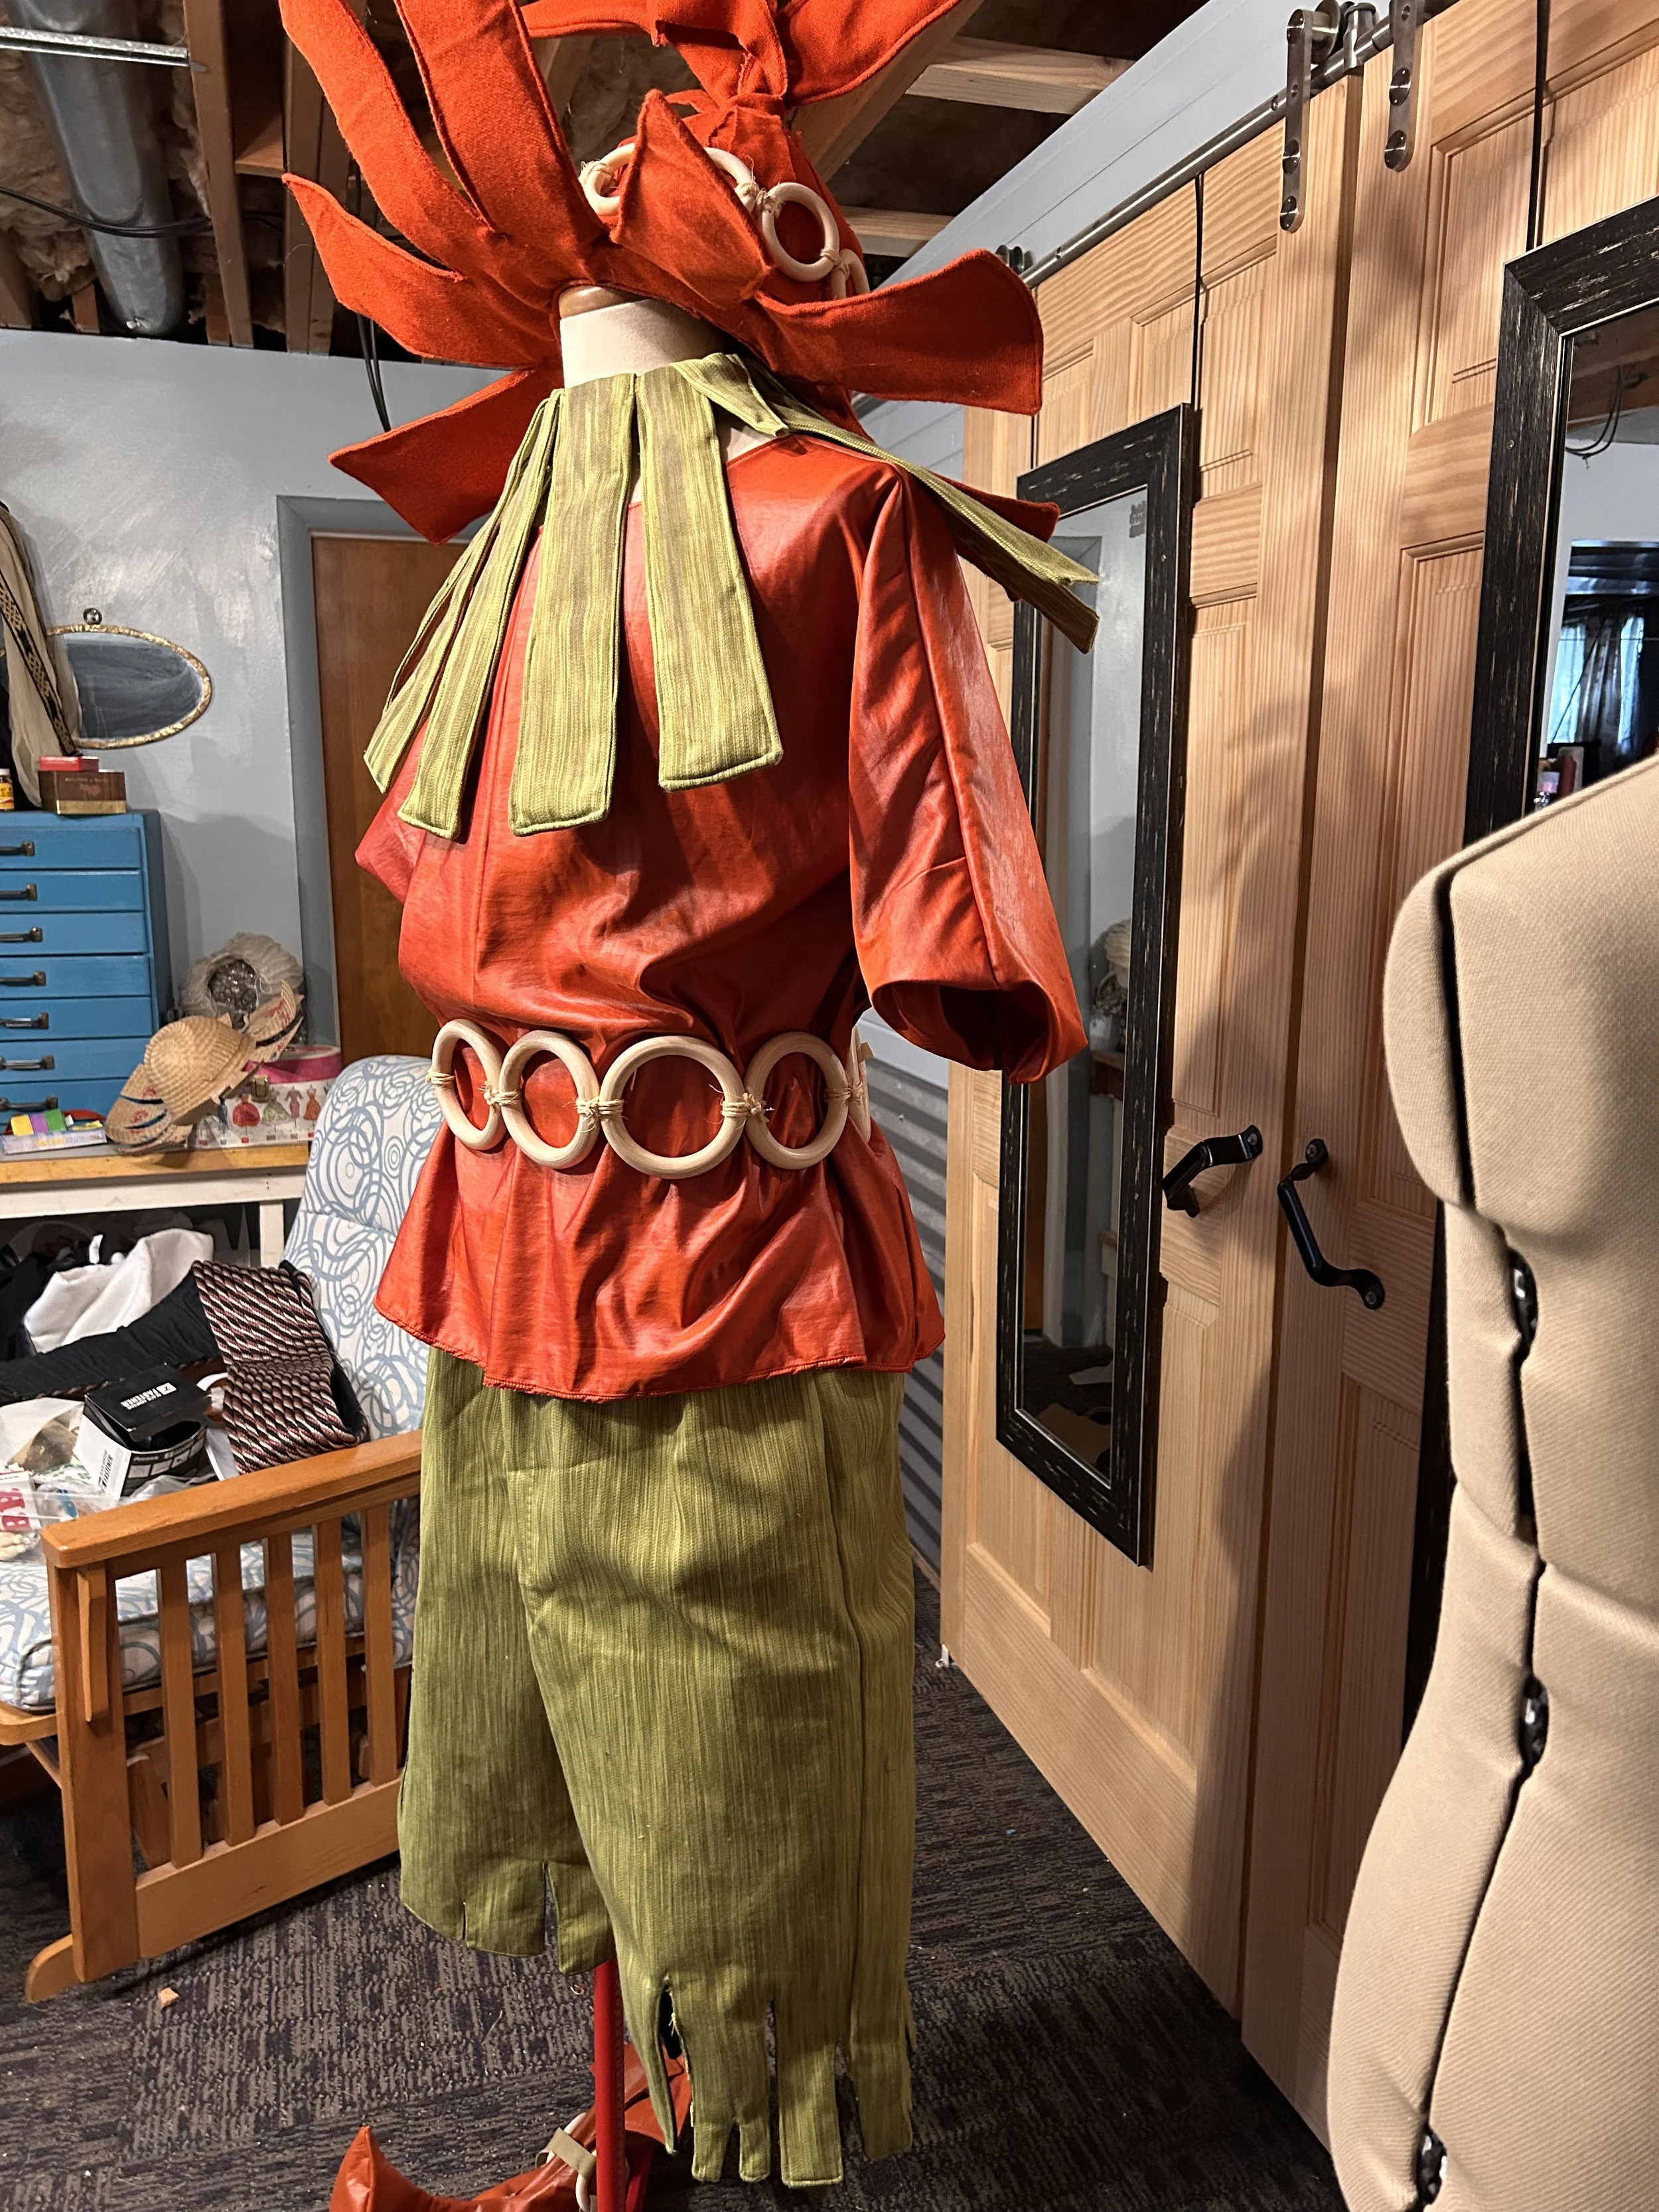
Assembling the Costume
Once the top and hat were completed, I moved on to the shorts. The fabric I selected has beautiful green hues and a patterned stripe that gives it a grassy appearance. By modifying an existing pants pattern and adding the craft interfacing, I created shorts that maintain their shape and add to the overall look of the costume.
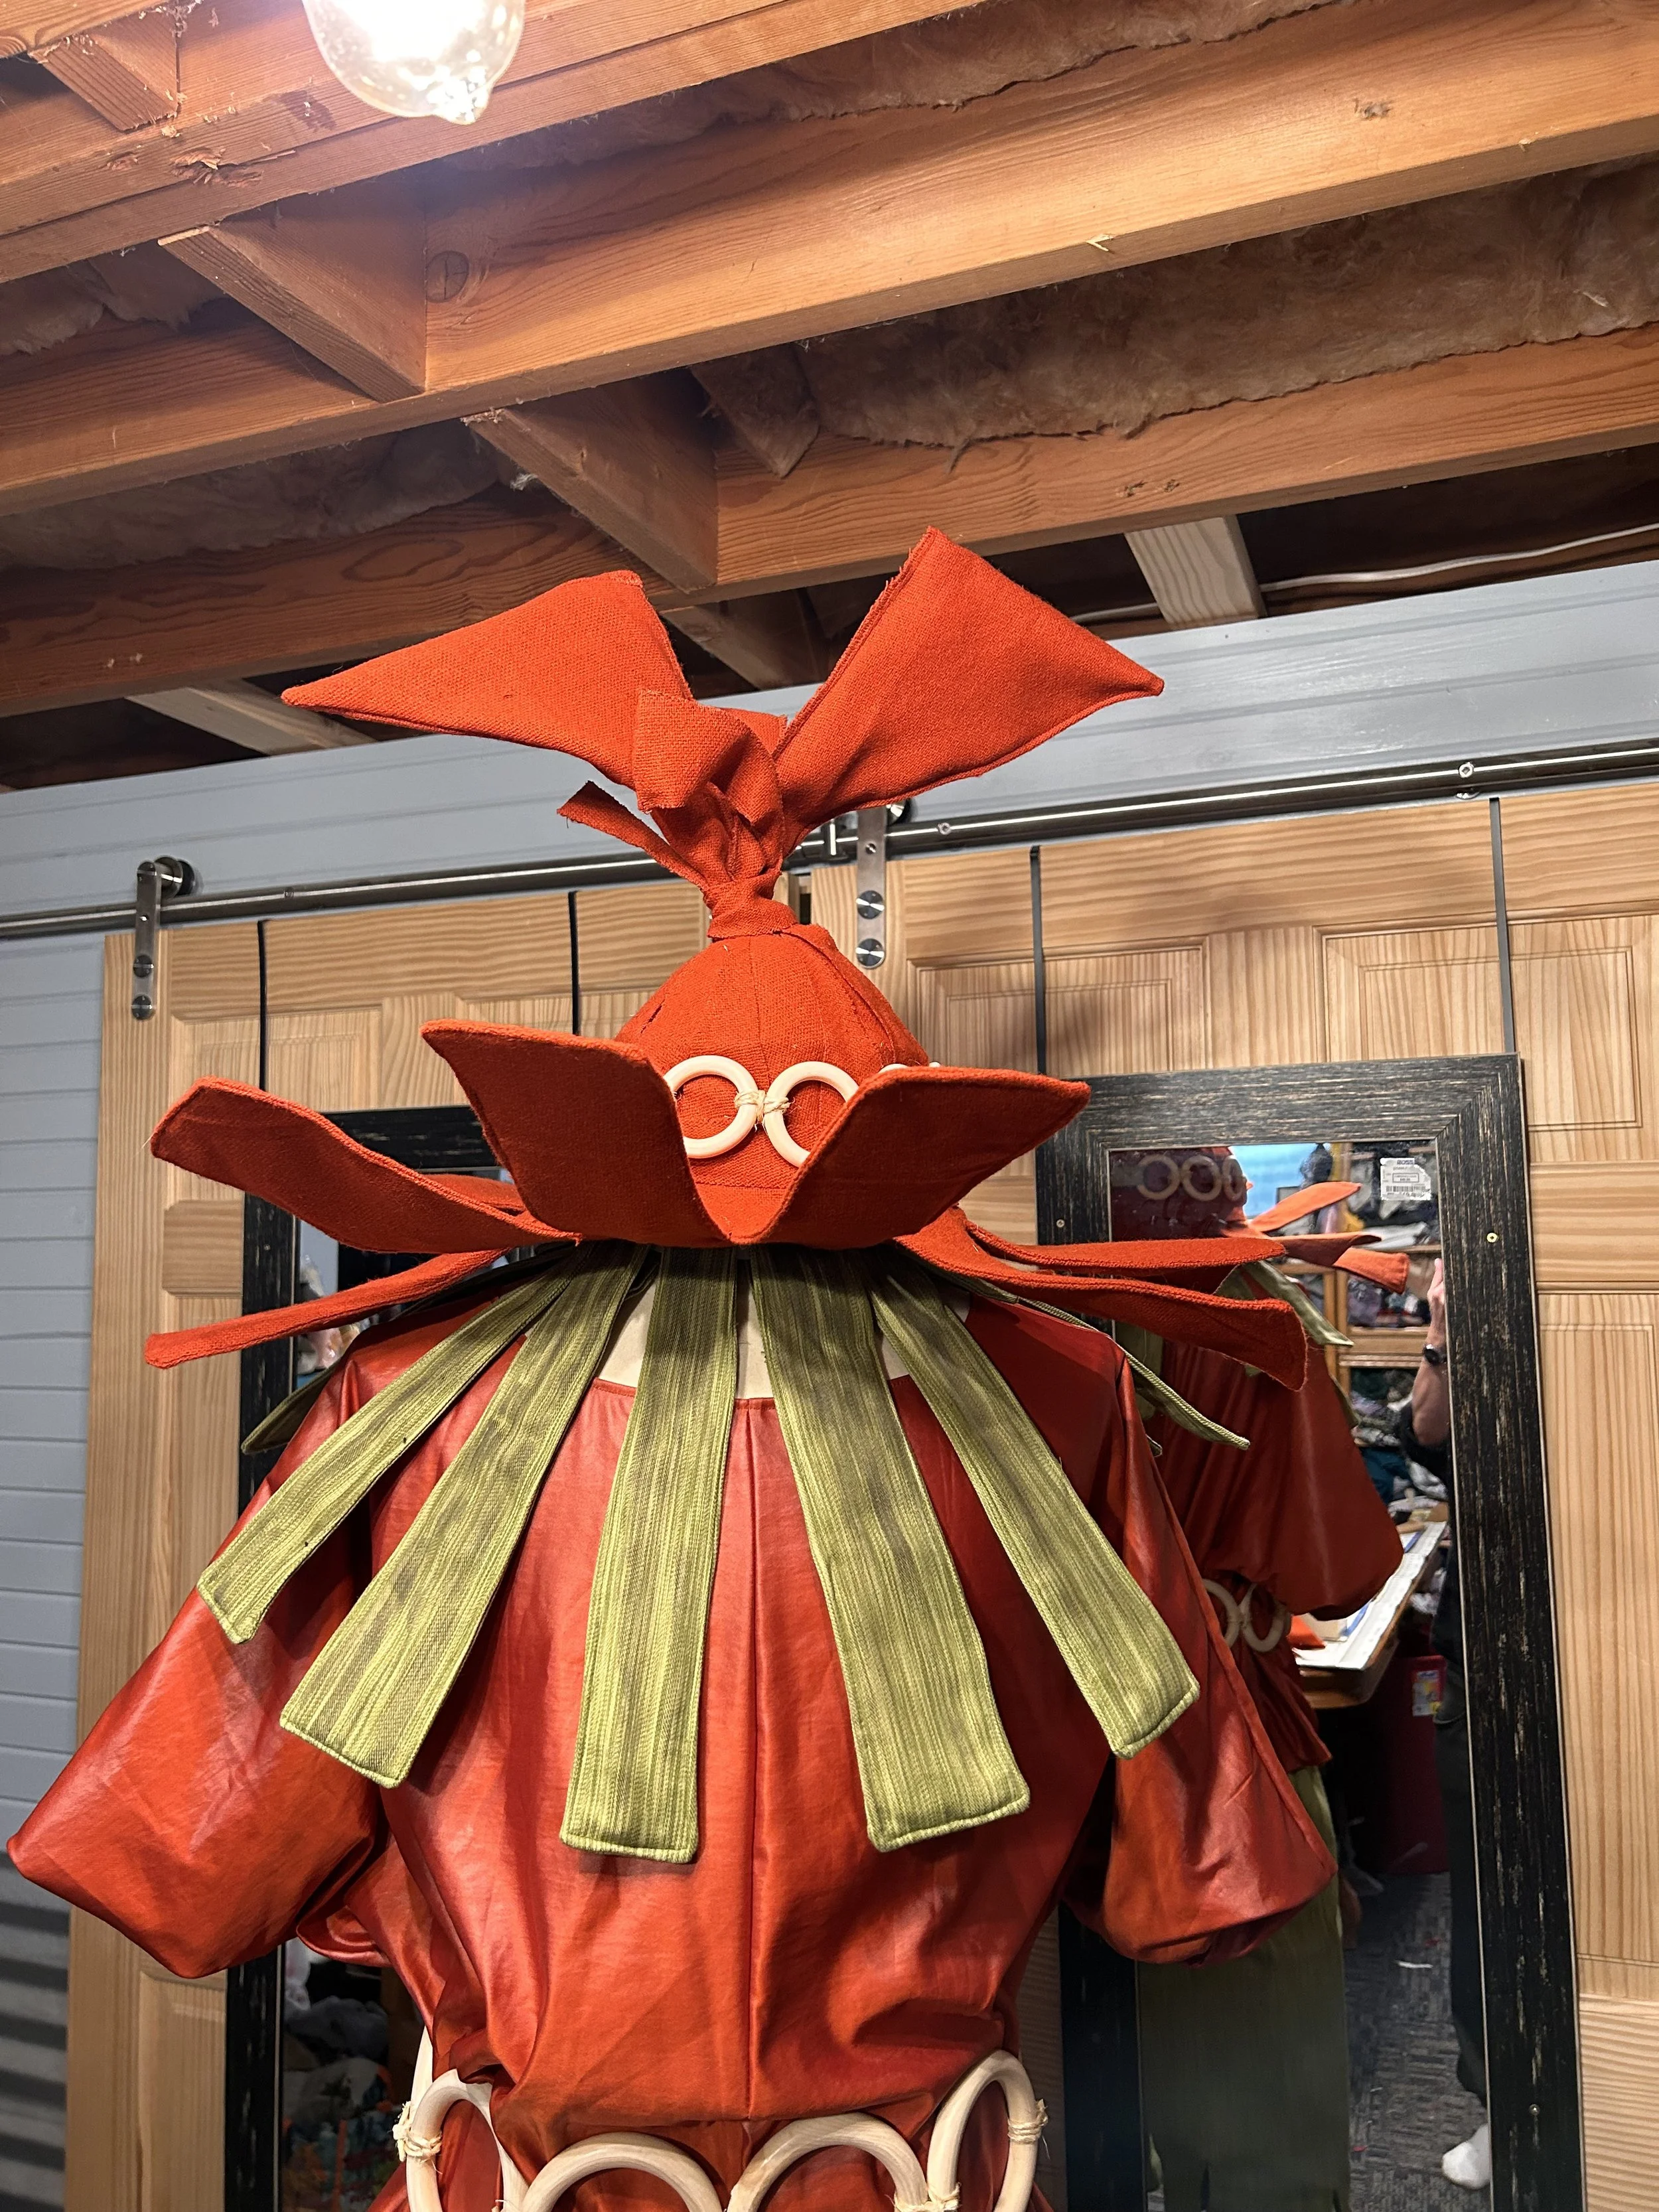
Here's a detailed view of the costume's back, showcasing the hat and shorts together:
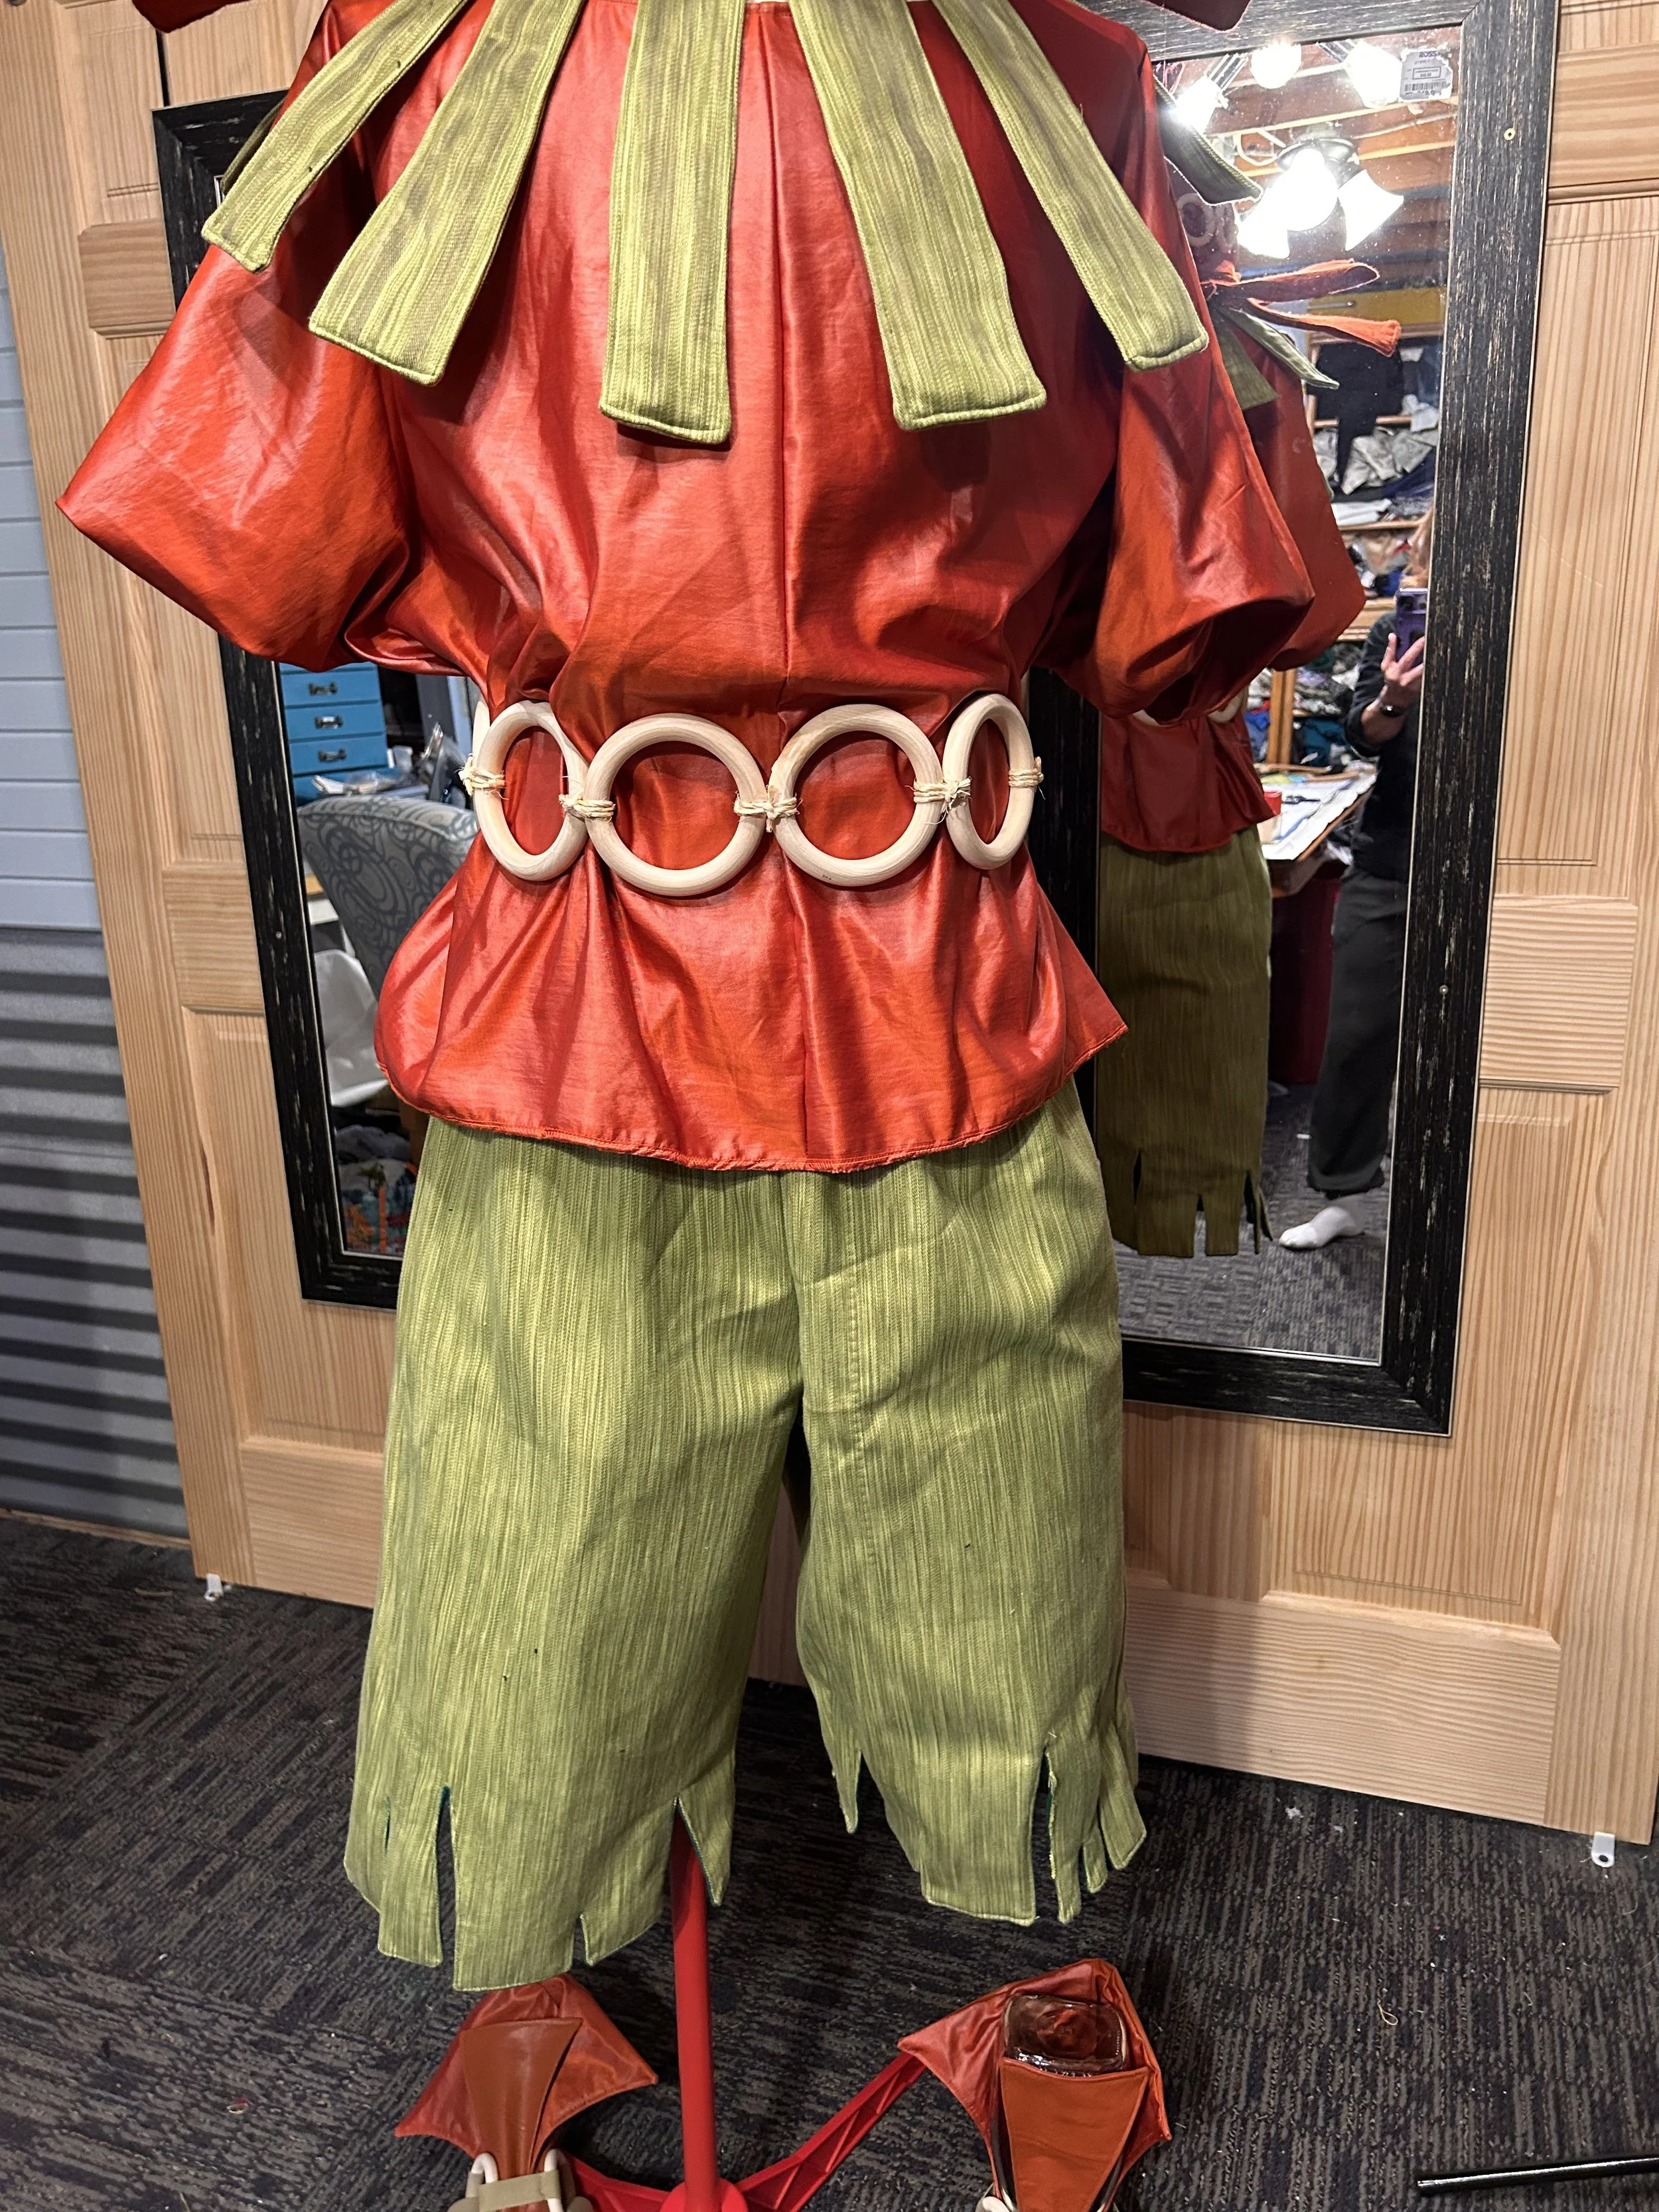
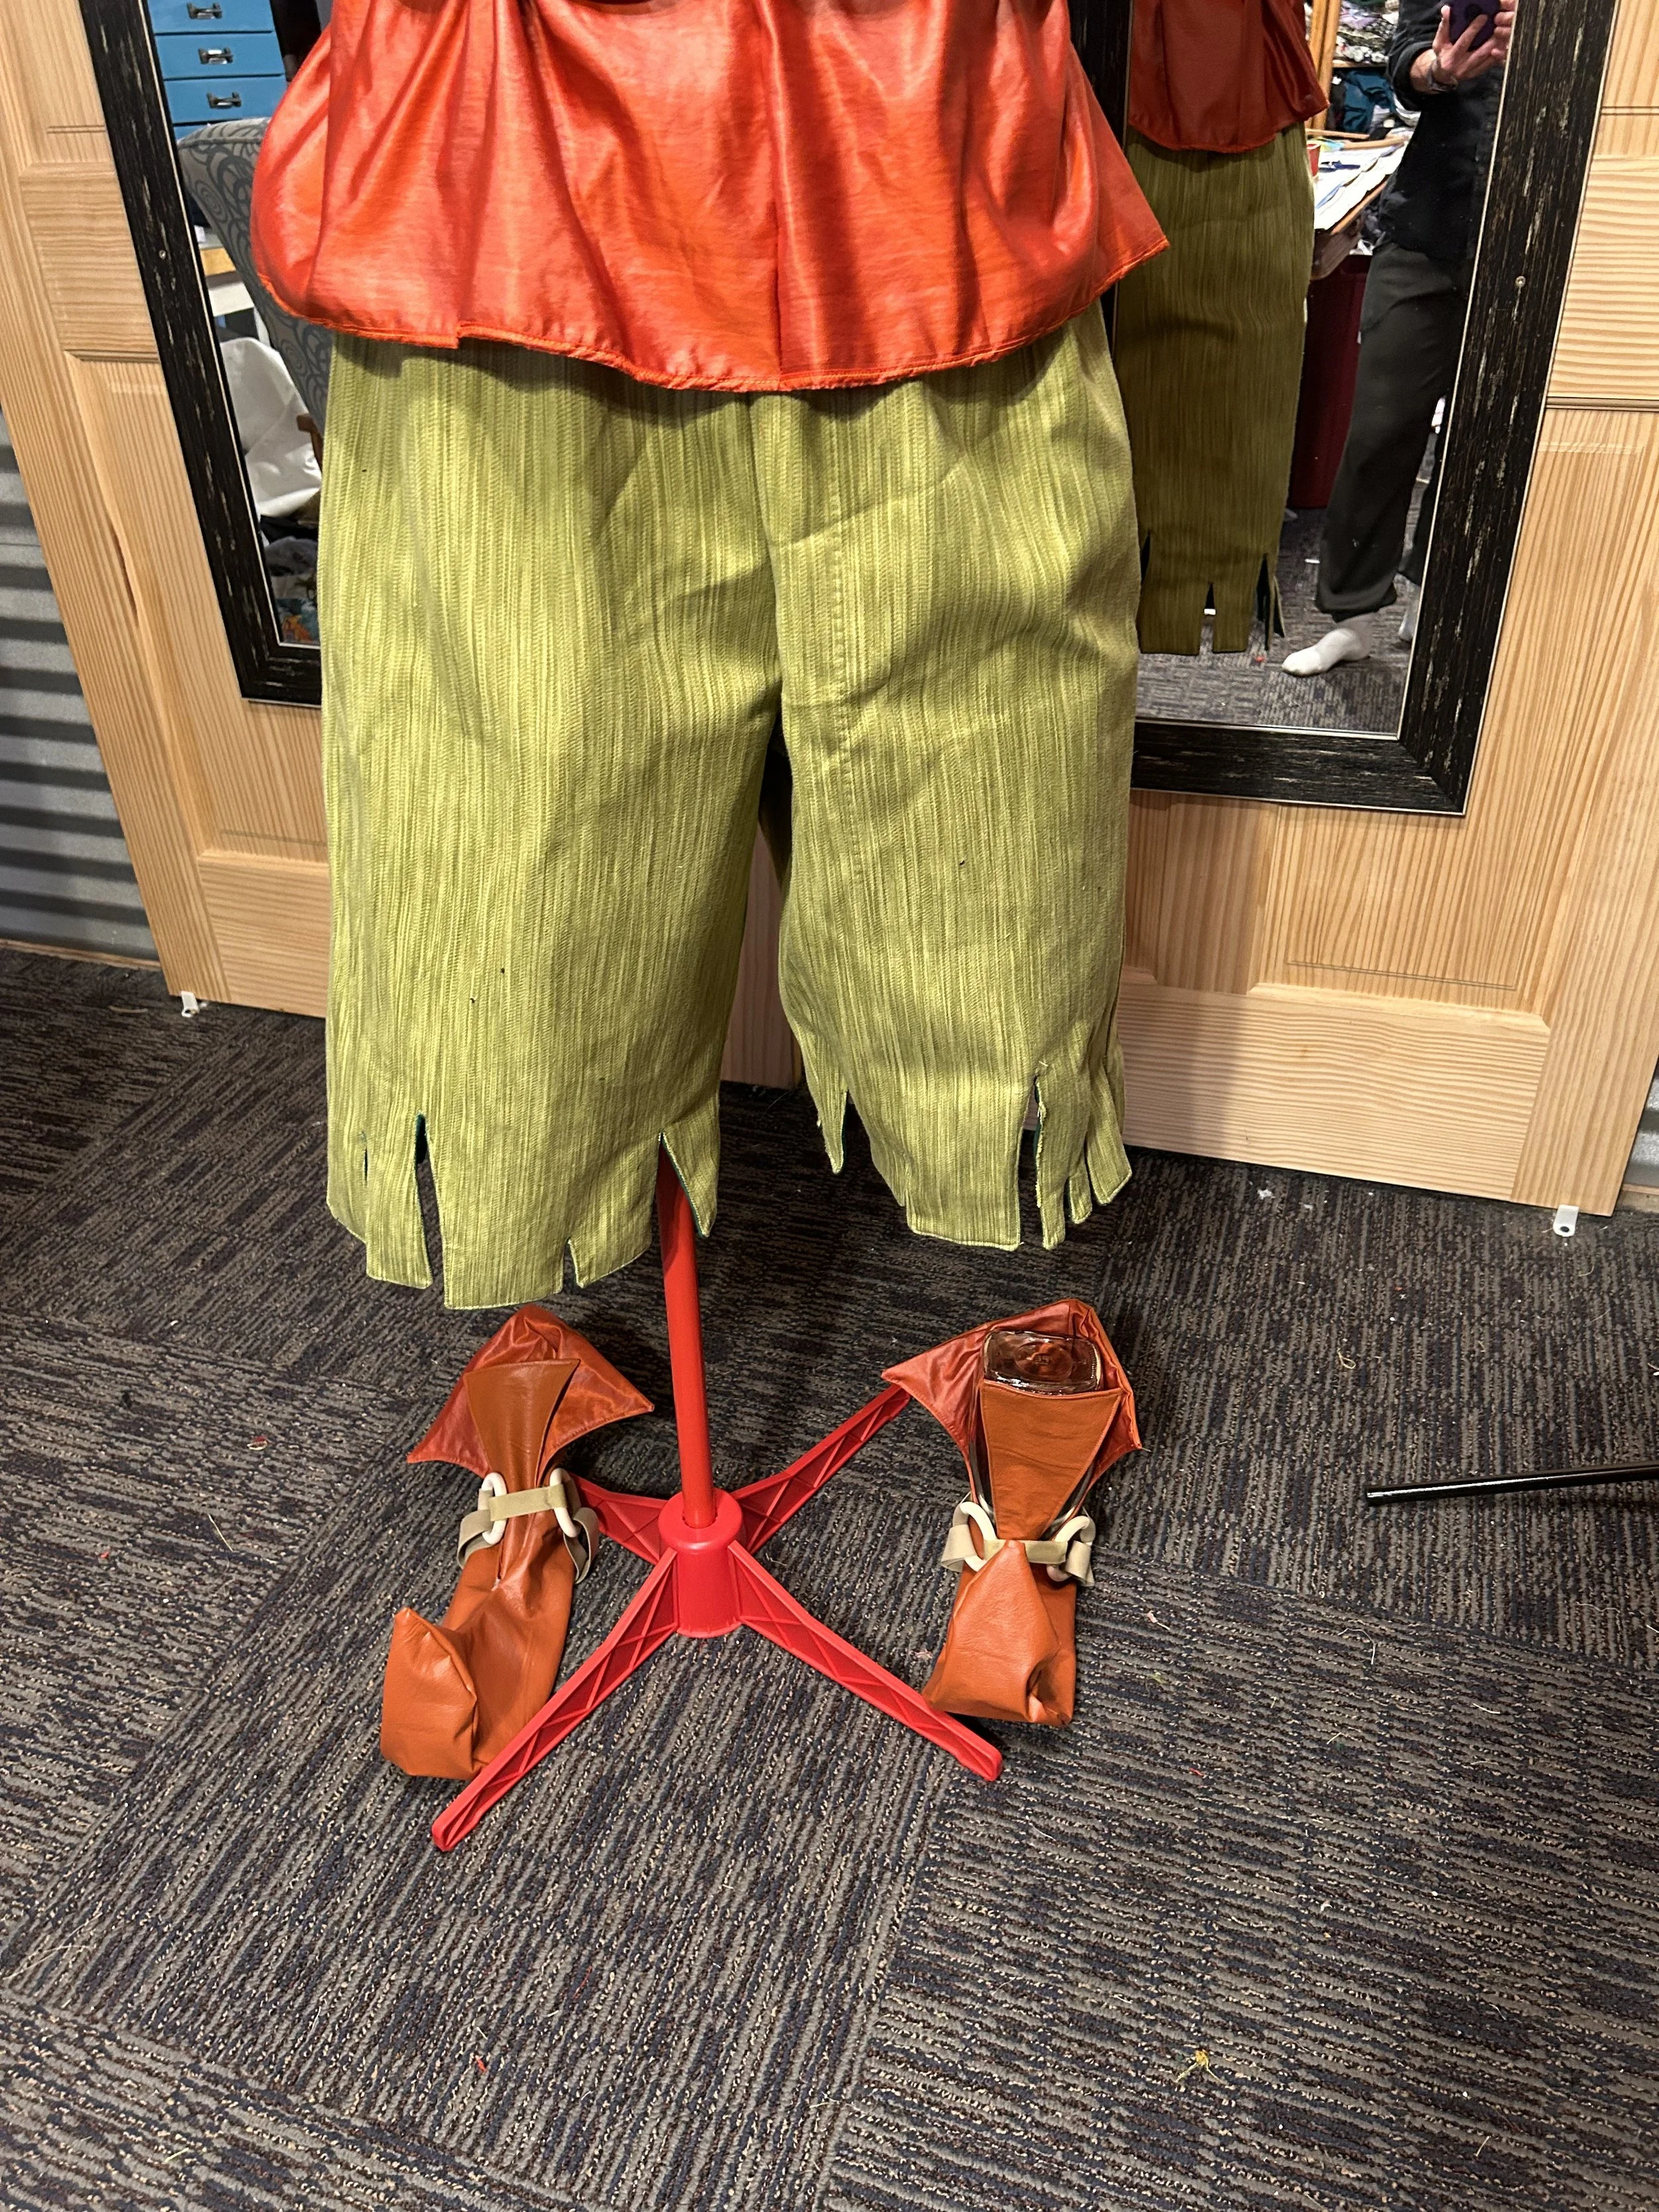
Final Touches
The final touches include adding weathering details to the fabric, ensuring all elements are securely attached, and making any necessary adjustments for a perfect fit. The result is a costume that not only looks fantastic but also stays true to Skull Kid's design from the game.
Here's the completed costume from different angles:
Looking Ahead
I hope this gives you a better understanding of what goes into creating a custom costume at OuterRim Creatives. This Skull Kid costume has been a delightful challenge, pushing me to refine my skills and explore new techniques. Next up, I'll be working on another exciting project, Dawn from the movie Terrifier, so stay tuned for more updates.
Thank you for joining me on this journey. If you have any custom costume needs, don't hesitate to reach out. At OuterRim Creatives, we're all about turning your vision into reality, one stitch at a time.
Talk to you soon!
Katie